After modifying the properties of a component on the workboard so as to change its look and feel, you can save the definitions as a new skin and apply it to the entire application.
To save a new skin:
1. Switch to Design Mode ![]() and click the Properties
and click the Properties ![]() button on the Task Pane toolbar to display the Workboard Properties Pane.
button on the Task Pane toolbar to display the Workboard Properties Pane.
2. In the Application section, cancel inheritance from skin by setting Inherit properties from skin to No.
3. Change the property settings you want in Application, Workboard and View levels.
4. Click the Save Skin button. If you have more than one component, you will be asked to choose the component from which to take the changed settings.
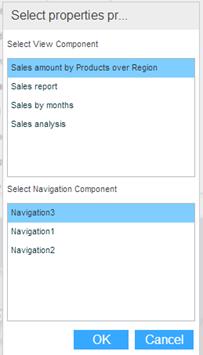
5. Choose a component and click OK.
6. In the save dialog box, navigate to the location where you want to save the skin on your computer. Enter a filename and click Save.
7. At this stage it is recommended to stop the Necto services. Then, copy the saved XML file to the server: \\e-bi\flash\config\skins.
You have two options:
§ Replace the existing skin, meaning that you will name your new skin default.xml overriding the existing skin. This will replace the skin for every user who uses Necto.
§ Add the new skin under another name (not default.xml). This allows you to select the new skin via the Skin property in Workboard Properties/Application to change the appearance of the application. This option is used for testing since only the user who changes the skin can see the changes.