You can add new components to the current workboard and replace existing components.
Adding a component involves two main steps:
· Dragging the component icon from the Toolbox on the ribbon to open a component container.
· Using the relevant wizard or editor to create the component contents.
To open a component container:
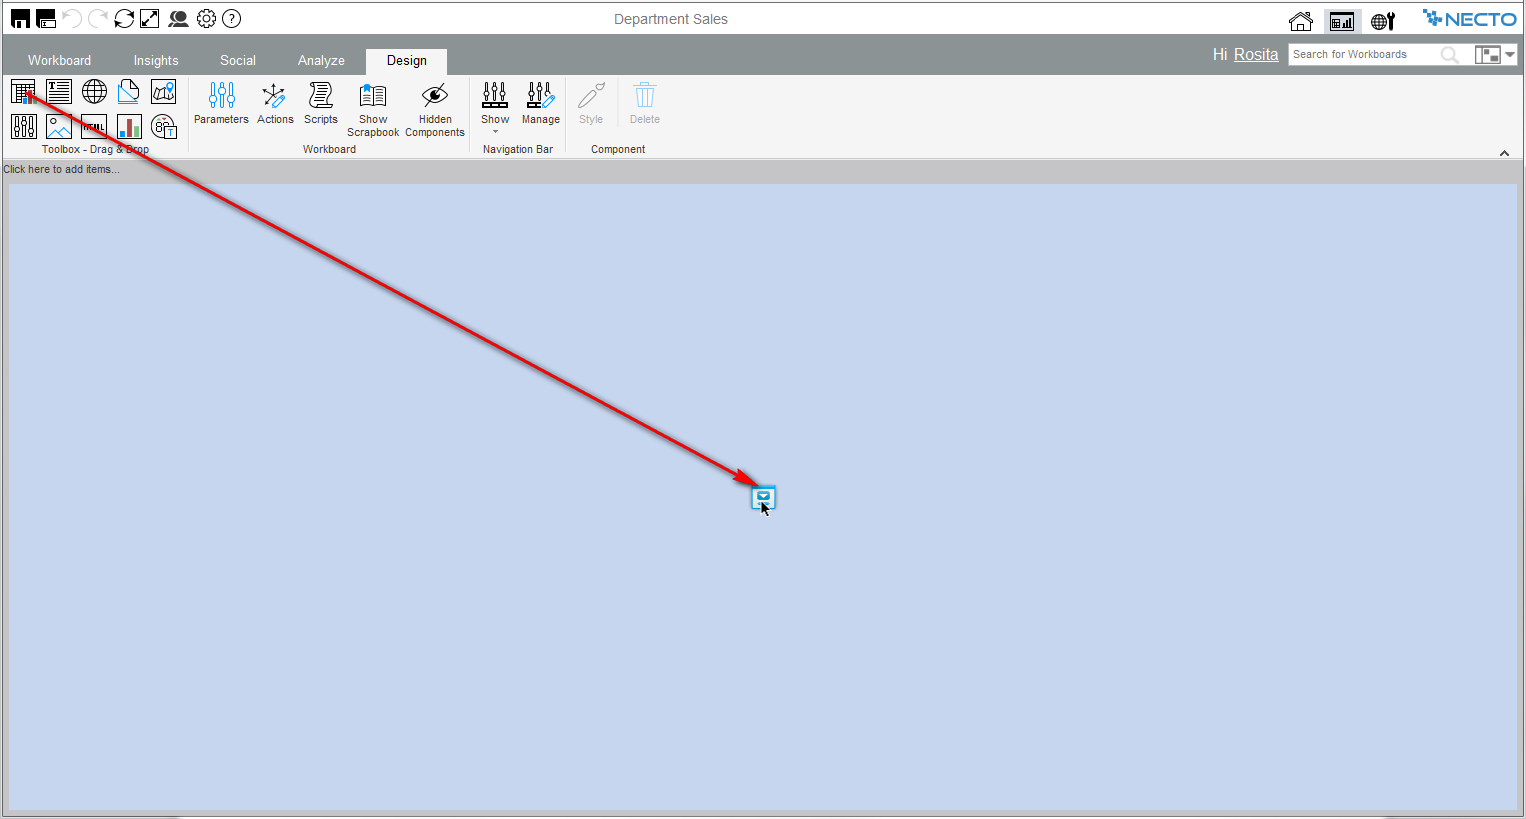
Drag the component icon from the Toolbox on the Design tab of the ribbon onto the workboard canvas. As you drag it, drop target indicators appear guiding you where to drop the icon. The possibilities are:
· On a blank workboard canvas: To position the first component on a blank workboard canvas, drop the icon at the center. The component will cover the entire canvas.
· On the side of the workboard: To position the component on one of the sides of the workboard – left, right, top, bottom – drop the icon on an outer target indicator.
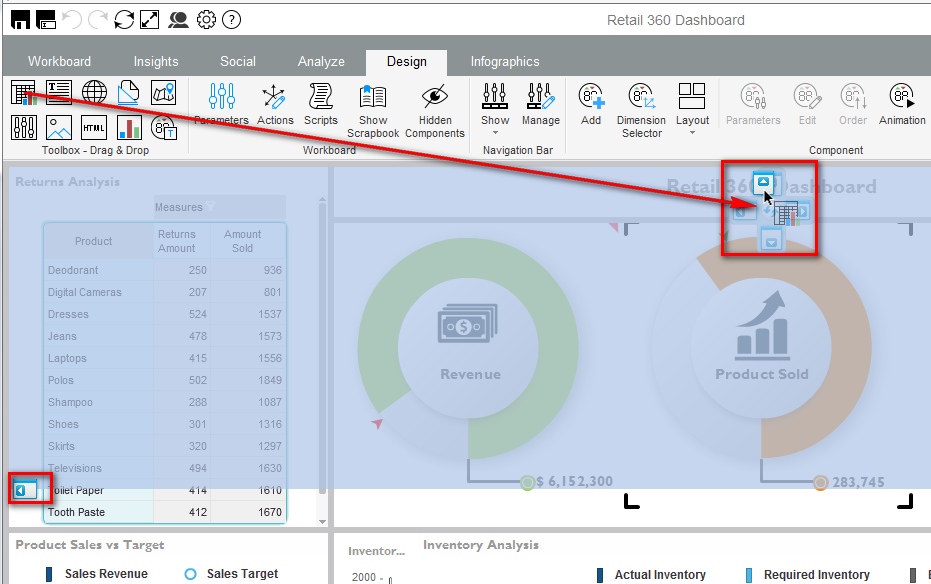
· On the side of another component: To position the component on one of the sides of another component – left, right, top, bottom – drag the icon to that component and drop it on a target indicator that appears in the component.
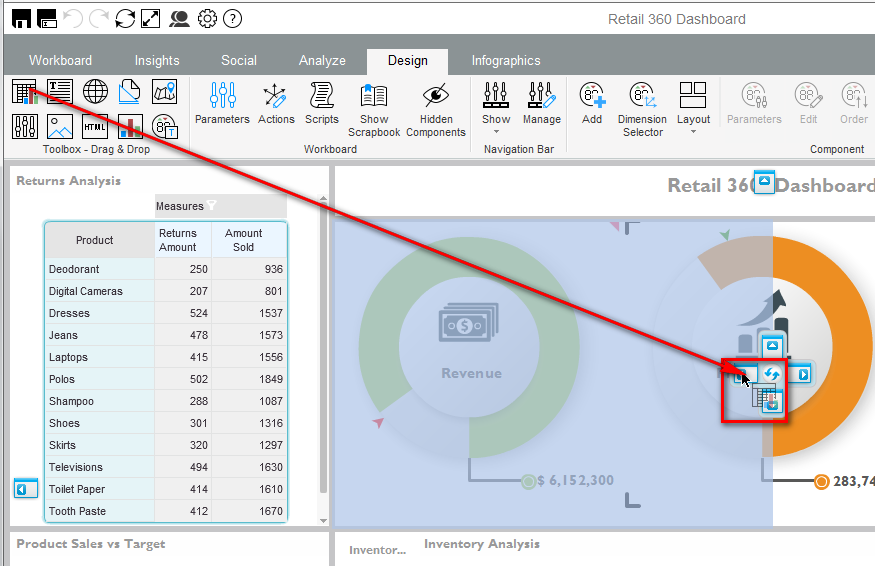
· Replace a component: To replace a component on the workboard with the new component, drag the icon to that component and drop it on the target indicator at the center.
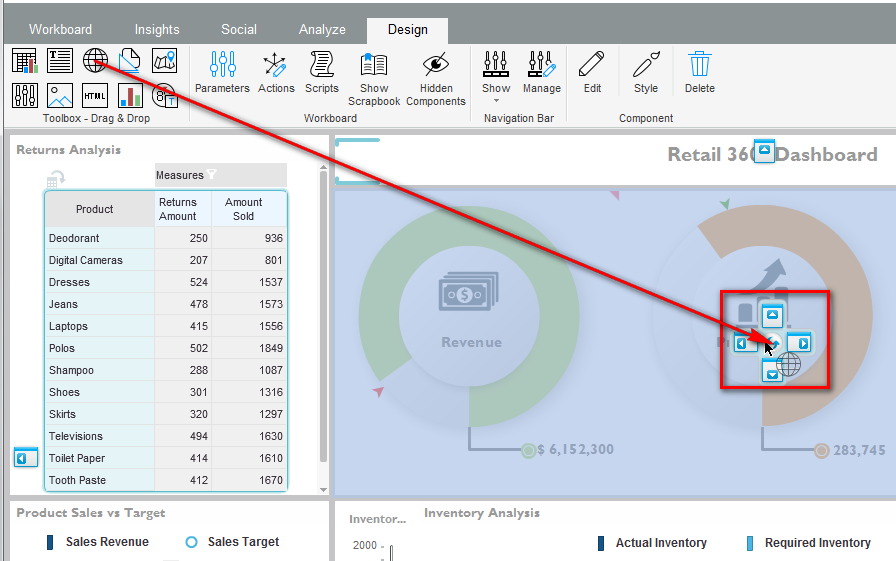
When you drag the component icon onto a target indicator, the area that the component will cover is shown in a darker shade of blue.
When you release the mouse button on the drop target indicator:
· The component container opens where you positioned it. Necto resizes other components to accommodate it.
· A wizard opens for creating the component contents. For example, in a view component the View Wizard opens. You can close the dialog box at this stage, and use the Edit ![]() button on the Design tab of the ribbon to create the contents later. For explanations on creating component contents, see Workboard Components.
button on the Design tab of the ribbon to create the contents later. For explanations on creating component contents, see Workboard Components.