This section contains properties that you can use to customize the current workboard.
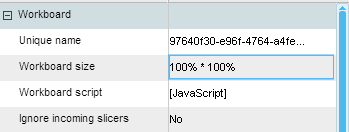
Workboard size
Enables you to change the size of the workboard by specifying width and height in percentage values.
When the size is larger than 100%, the workboard will include scrollbars.
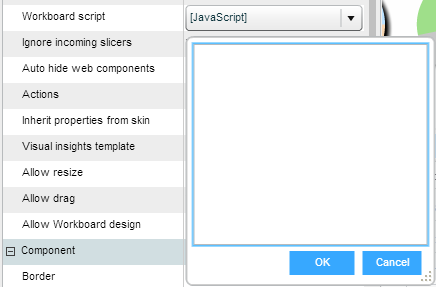
Workboard script
Click to add a script (JavaScript) that will be executed when the workboard is loaded.
Ignore incoming slicers
When the “keep slicers between workboards” option is set on for an application, slicing performed in a workboard automatically applies to other workboards the user opens. By setting the Ignore incoming slicers property to Yes, you can deactivate the between-workboards slicing option so that the slicers in one workboard will not affect other workboards.
Splitter color
You can change the color of the component borders by selecting a color from the palette.
Actions
This property is used to define an action to be executed from different locations in the workboard:
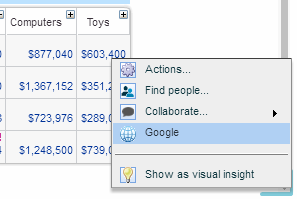
1. Click on the value column and then click the dropdown arrow.
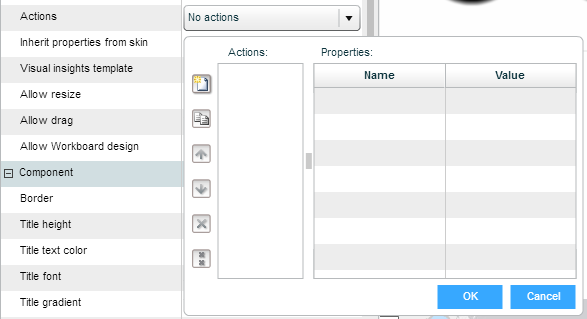
2. Click the Create ![]() button and click on Action. From the dropdown, select an action.
button and click on Action. From the dropdown, select an action.
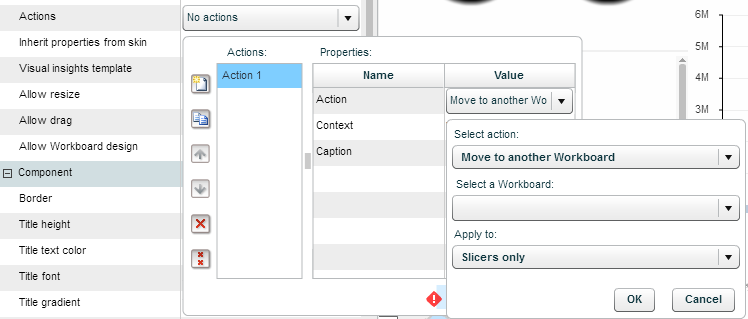
Move to another workboard
Clicking on the action will move the user to the workboard defined in this property.
Choose Move to another workboard, and in Select a Workboard choose the workboard to navigate to.
In Apply To, specify where to apply the action: Slicers Only or both Slicers and Crosstab.
Click OK.
Open a browser window
Clicking on the action will open the specified web page in a browser window.
Choose Open a browser window, and in Enter page URL type in the page address.
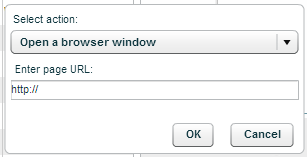
Click OK.
Execute a JavaScript expression
Clicking on the action will execute the entered JavaScript code.
Choose Execute a JavaScript expression.

Click the arrow in Enter JavaScript expression and type in the code.
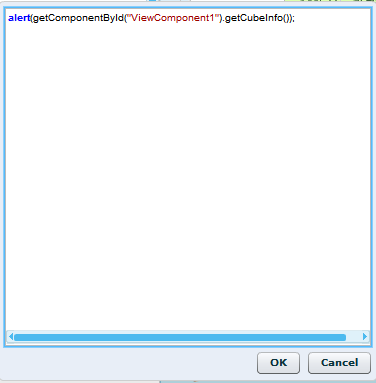
Click OK.
3. Click on Context and specify from where you want to execute the action: Workboard name (at the top left corner of screen), X-Axis, Y-Axis, grid Cells, or from All of these locations.
If you choose Cells (or All), the action displays when you click on a grid cell.
4. In Caption, the action caption appears automatically. The caption appears in the action’s tooltip. Click on it to edit it.
5. Click OK and then click Apply in the Properties Pane.
Inherit properties from skin
When set to Yes, properties will be inherited from the application’s skin. To enable editing of properties, set it to No.
Visual insights template
The default template for presenting insights on the workboard. The default template is designed via the Infographics Designer.
To select another template, click on the value column and then click the dropdown arrow. Select the template from the Infographics selection window.
Components to print
Enables you to select the components that should be included in workboard printouts (Save as PDF option). Click to open the Select Components to Print dialog box.

By default, all components are selected for printing. Deselect the ones you do not want to print.
The components will be printed in the order they are listed here. To reorder the list, click on a component and use the arrow keys on the right to move it to another position.
Page Header
Enables you to create a customized header for workboard printouts. Click to open the header design dialog box.

You can define the elements to display in the left, center and right sections of the header. Position the cursor in the relevant box and enter text and/or placeholders.
To select a placeholder, click Insert Placeholder.
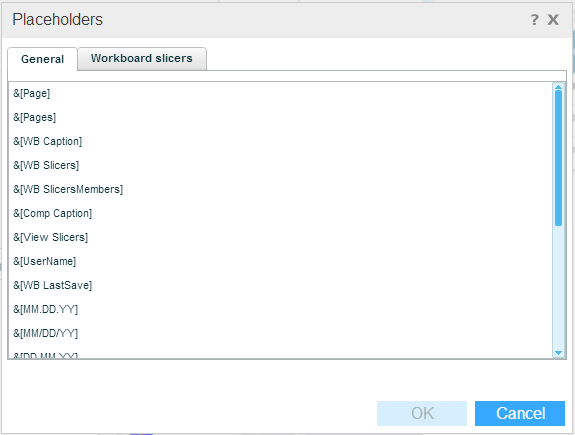
Select a placeholder from the General or Workboard Slicers tabs.
By default, the workboard caption and workboard slicers placeholders appear in the center section: &[WB Caption] Filtered by &[WB Slicers].
Page Footer
Enables you to create a customized footer for workboard printouts. Click to open the footer design dialog box.
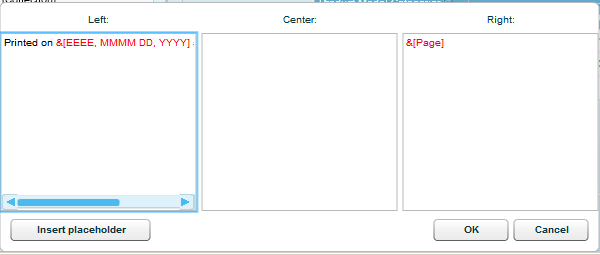
In the same way as for the header, define the elements to display in the three sections of the footer. By default, the page number placeholder appears in the right section: &[Page], and the day, date and time placeholders in the left section: Printed on &[EEEE, MMMM DD, YYYY] at &[Time_24].