If the View Wizard is not activated, click the Wizard ![]() icon on the view component title bar. The wizard enables you to connect to different data sources and create a new view from scratch.
icon on the view component title bar. The wizard enables you to connect to different data sources and create a new view from scratch.
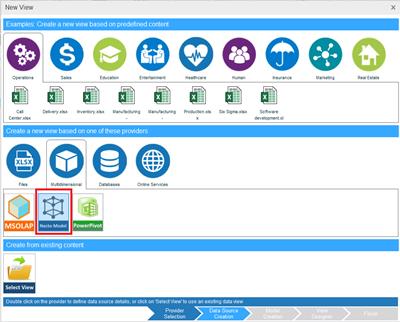
To create a new view:
1. In the Provider Selection step, select a provider type and then the data source type, and click Data Source Creation.
2. The Data Source Creation step displays settings that are relevant for the selected data source type. Enter the required settings.
The Paste Table option in the Data Source Creation step enables you to copy and paste a table, and use it as a data source.
3. Click View Designer.

To use the options in this window, see Using the Dimensions Selector in a View Component.
4. Click Finish.
5. Click the Save ![]() button on the Application Bar and then the Save
button on the Application Bar and then the Save ![]() button to save the workboard with the view component.
button to save the workboard with the view component.
6. The Workboard Topics dialog box opens for tagging the workboard with new or existing topics that best describe your content.
7. Select a topic in the Topics Dictionary and click the Add arrow to move it to the Workboard Topics panel. You can select several topics using Ctrl-click or Shift-click. Click Save.